
Pressing Ham for Sewing: Which Pressing Tool for Sleeves, Shoulders, Collars and Buttons
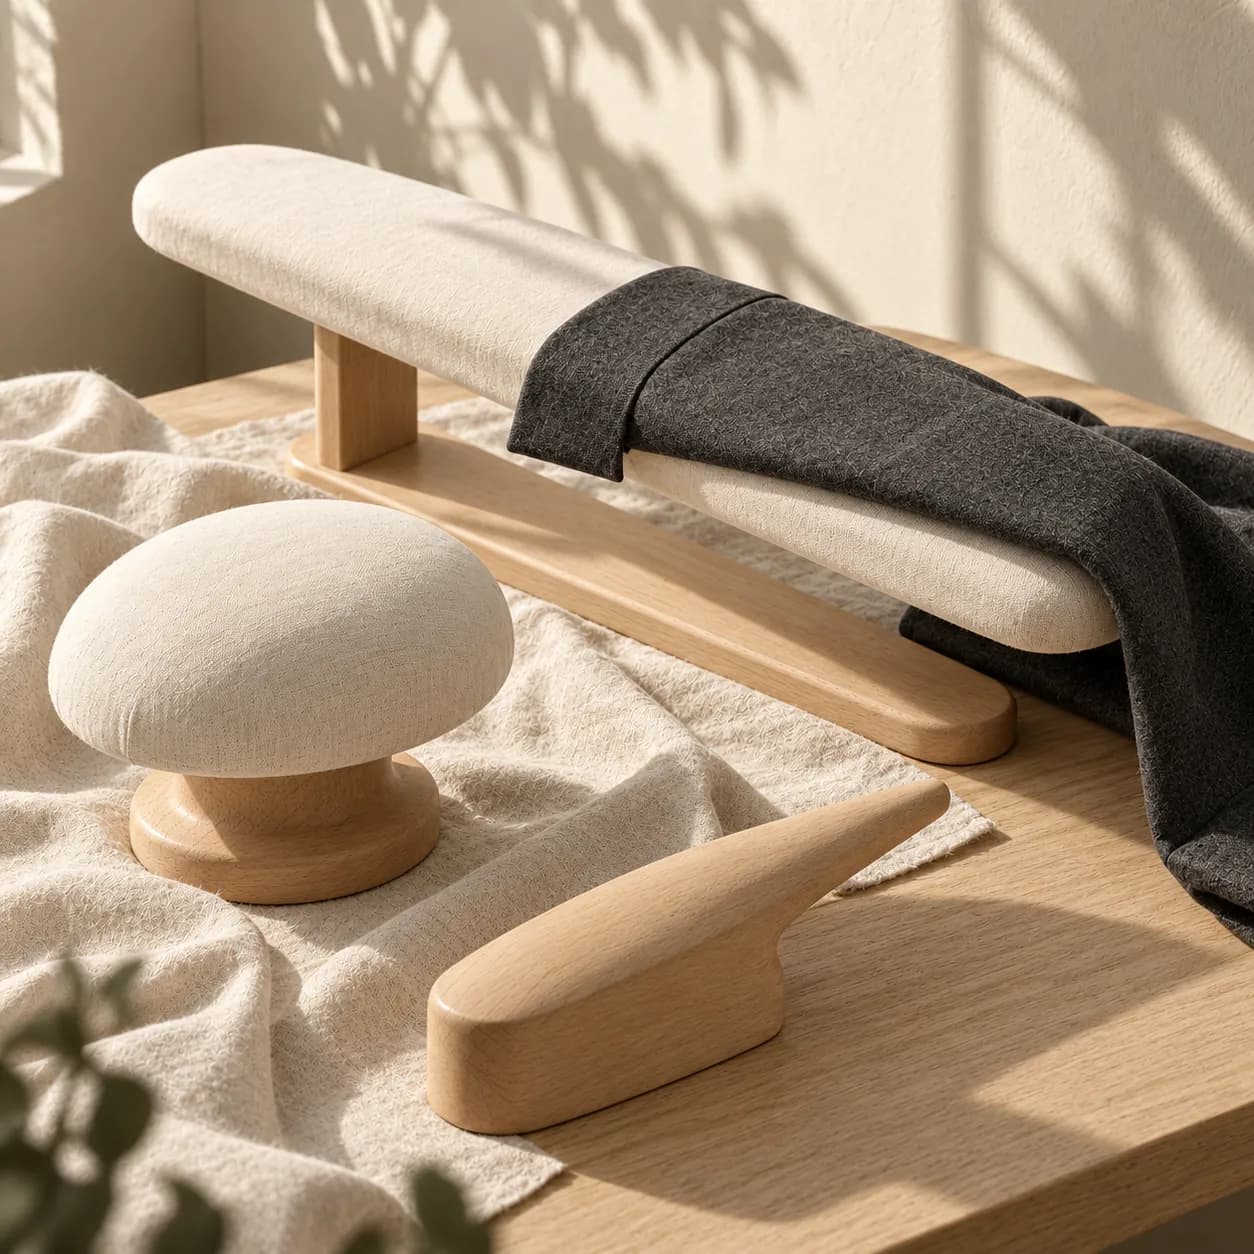
A practical guide to choosing a pressing tool by garment area: sleeves, sleeve caps, shoulders, collar points and button plackets, with the right working order and recommended kits for home and studio.
A pressing tool for sewing is chosen by the part of the garment you are pressing, not by size or looks. A long sleeve and a trouser leg need a long, narrow sleeve board, a sleeve cap and shoulder need a rounded surface, a collar point needs a pointed wooden tool, and a button placket needs a pressing pad with a slot. This guide maps each part of the garment to the tool that suits it, explains at which stage of sewing each one is used, and suggests kits by type of work: home sewing, alterations, a dress studio and a sewing school.
Why no single pressing tool does it all
Every pressing tool is built for a particular fabric shape. A long, narrow surface fits inside a closed sleeve. A rounded dome supports fabric sewn into a curved shape, such as a sleeve cap or the tip of a dart. A thin wooden tip fits into a corner where there is no room for a padded tool.
When you press a curved area on a flat surface, the fabric is pressed into a crease it should not have. When you press a closed sleeve on a regular board, a fold line forms along its length. That is why seamstresses and tailors work with several small tools side by side. The general explanation of pressing tools and pressing technique is on the pressing hams and boards category page. Here we focus on the practical question: which tool to use for which part.
Work map: which pressing tool for which part of the garment
Long sleeves and trouser legs
A sleeve already sewn into a tube needs a surface that fits inside it, so you press one layer at a time. A long sleeve board, about 56 cm long and 15 cm high, lets you press an entire sleeve without moving it much, and open the sleeve seam along its full length. It also suits narrow trouser legs and hems after shortening.
For short sleeves, cuffs and children's clothes, the compact sleeve board, about 28 cm long on two posts, is more convenient. The ends of the board extend beyond the posts, so you can slide a sleeve or cuff around them.
Sleeve caps, shoulders and darts
These areas are sewn into a curved shape and are pressed on a surface that holds the curve. A mushroom pressing ham is a padded dome on a wooden post, 20.5 cm high on a round 18.5 cm base. It suits dart tips at the bust and hip, princess seams, cups in evening wear and swimwear, sleeve caps and fabric hats. Turn the base on the table to bring the right side to the iron.
The universal pressing ham on a 40 cm stand is a 21×14 cm padded roll with an open end. The open end lets you slide on short sleeves and baby sleeves, and it is handy for the shoulder line and the sleeve-attachment seam in jackets, coats and dresses.
The elongated pressing ham on a wooden post, 31 cm long with an overall height of 22.5 cm, combines both needs: a wide side for shoulders, sleeve caps and the bust area, and a narrow side for cuffs, collars and children's sleeves.
Collar points, lapels and cuffs
Before turning a collar right side out, you press the seam allowances open in the corner. A padded tool will not fit into such a corner. The wooden tool with a pointed tip, known as a point presser, is made of solid wood without padding, with a 19 cm pressing surface and a height of 7 cm. Slide the collar, still inside out, over the thin tip and press the seam allowances open all the way to the corner. After turning, the corner comes out sharper and flatter. The same tool is used for the tips of lapels, cuffs and belts, as well as for the corners of decorative cushions and curtains.
Button plackets, zippers and embellishments
The pressing pad with a slot is a 14 cm wide padded surface on a 33 cm wooden base, with a U-shaped slot at the end. The slot lets you press between buttons, along a zipper and around fasteners, appliqués and beads, without pressing them into the fabric. It is useful for shirts, dresses, baby clothes and embellished evening wear.
Quick comparison of pressing tool types
Long sleeve board: about 56 cm, 15 cm high. For a whole sleeve, trouser legs and hems.
Compact sleeve board: about 28 cm, 15 cm high, on two posts. For cuffs, short sleeves and children's clothes.
Elongated ham: 31 cm, overall height 22.5 cm, a wide side and a narrow side. An all-round tool for shoulders, sleeve caps and cuffs.
Universal ham on a stand: 21×14 cm roll at a height of 40 cm, with an open end. For the shoulder line, sleeve caps and short sleeves.
Mushroom ham: padded dome, 20.5 cm high, 18.5 cm base. For areas curved in every direction: darts, cups and hats.
Pad with a slot: 14 cm wide, 33 cm base. For button plackets, zippers and embellishments.
Pointed wooden tool: solid wood, 19 cm, no padding. For collar points and lapels before turning.
At which stage of sewing each tool is used
The basic working rule: press every seam before another seam crosses it. Once the pieces are joined, some seams are no longer accessible. This is the pressing order when sewing a shirt or dress with sleeves:
Darts: press on the mushroom ham or the wide side of the elongated ham, along the seam line and not beyond the dart tip, in the direction indicated on the pattern.
Shoulder and side seams: open and press on the universal or elongated ham, so the garment's curve is preserved.
Collar and cuffs: before turning, press the seam allowances open at the corners on the pointed wooden tool, and after turning, press the edge.
Sleeve seam: after closing the sleeve into a tube, press the seam open on the sleeve board.
Sleeve cap: after attaching the sleeve to the body, press only the seam allowance area on a rounded surface, without flattening the sleeve cap itself.
Finishing: the button placket and zipper on the pad with a slot, and hems on the sleeve board.
Three rules that improve any pressing on a ham
Let the fabric cool. Fabric sets its shape as it cools and dries. If you move it off the ham while it is still warm and damp, it stretches and the curve is lost. Wait a few seconds before turning the garment to the next area.
Separate the seam allowances from the garment. On thin or dark fabrics, seam allowances can leave a mark on the right side. Slip a strip of thick, unprinted paper between the seam allowances and the fabric before pressing. Printed paper may transfer ink.
Test on a scrap. Before working on the garment, test the temperature and steam on a scrap of the same fabric, and press from the wrong side whenever possible. When that is not possible, work through a pressing cloth.
How to build a pressing tool kit by type of work
Home sewing: one elongated ham covers shoulders, sleeve caps and cuffs. If you sew dresses with darts, add a mushroom ham, and if you sew shirts with collars, add the pointed wooden tool.
Alterations and shortening: the work centers on sleeves, hems and trouser legs, so the long sleeve board is the main tool. A pad with a slot makes it easier to press a button placket after replacing buttons or a zipper.
Evening and bridal wear studio: a mushroom ham for cups and darts, a universal ham on a stand for sleeve caps and shoulders, and a pad with a slot for areas with embellishments and beads.
Schools and sewing courses: a practical option is to equip each workstation with an elongated ham, and keep several sleeve boards, mushroom hams and pointed wooden tools in the classroom for shared use. For quantity orders there is a wholesale quote based on quantity.
Stores and garment photography: the universal ham and the elongated ham let you press one area of a finished garment, such as a shoulder or collar, before hanging or photographing it, without spreading the whole garment on a board.
Pressing ham and ironing board: how they work together
Pressing hams do not replace a board. Large pieces of fabric, fabric before cutting, and wide dresses and skirts are pressed on a long, flat surface. The ham comes into play when the fabric takes on a three-dimensional shape. In a home sewing corner, a folding ironing board with an elongated ham or a sleeve board beside it is enough for most jobs. In a studio, the hams are placed on a stable work table next to the board, so you move from the flat surface to the ham without moving the garment much.
All the pressing tools mentioned in this guide are in the pressing hams and boards category, with full dimensions on each product page. You can pick them up from Kfar Giladi 15 or HaMashbir 17 in Tel Aviv, or order delivery. For advice on putting together a kit for a studio or school, and for a wholesale quote, contact us by phone at 03-9444226 or on WhatsApp at 055-2473993.
Frequently asked questions
Which pressing ham should you buy first?
For anyone sewing clothes at home, a long pressing ham with a wide end and a narrow end is a good starting point, because it covers shoulders, sleeve caps, cuffs and collars. After that, add tools according to the type of work: a long sleeve board for repairs and hems, a mushroom ham for dresses with darts, and a pointed wooden pressing tool for collared shirts.
Why isn't it enough to press a sleeve on a regular ironing board?
When a closed sleeve lies flat on a board, you press both layers together and a crease forms along the sleeve. A sleeve board fits inside the sleeve, so you press one layer at a time and rotate the sleeve around the board. This also lets you press the sleeve seam open along its full length.
How do you press a sleeve cap after it's been set into the garment?
Place the seam area on a curved surface, such as a pressing ham or the wide side of a seam roll, and work from the inside of the garment. Press only the seam allowance area, not the entire sleeve cap, so you don't flatten the curve. Wait for the fabric to cool before moving it.
How do you get a sharp collar point?
Before turning the collar, slip it wrong side out over the narrow end of a pointed wooden pressing tool and press the seam allowances open right up to the corner. After turning, the seam allowances lie flat inside the corner and the point comes out sharper. Finally, press the collar from the wrong side or through a press cloth.
Why should you wait for the fabric to cool before moving it off the ham?
Fabric sets the shape it was given by pressing as it cools and dries. If you lift or turn it while it is still warm and damp, it can stretch and lose the curve or the seam line. A few seconds of waiting on the ham is enough for most fabrics.
How do you prevent seam allowance imprints on the right side of the garment?
Slip a strip of thick, unprinted paper between the seam allowance and the fabric before pressing, so the pressure doesn't reach the top layer. Printed paper can transfer ink to the fabric. On delicate fabrics, press from the wrong side or through a pressing cloth.
When do you press a seam during sewing?
Press every seam right after sewing it, and before another seam crosses it. Once the pieces are joined, some seams can no longer be reached for proper pressing. Pressing throughout the process, not just at the end, is one of the most noticeable differences between a homemade finish and a professional one.
How do you press a narrow trouser leg or a children's sleeve?
Slide the leg or sleeve onto a sleeve board, press one layer and then rotate. A long sleeve board suits trouser legs and long sleeves, while a compact board or an open-ended board suits short sleeves and children's clothes. Press a long trouser leg in sections.
Which pressing tools does a sewing studio or school need?
A practical option is to equip each workstation with a seam roll, and to keep several sleeve boards, pressing hams and pointed wooden tools in the room for shared use. A studio making evening gowns will add a pad with an opening for embellishments and beads. For bulk orders you can get a wholesale quote by phone or WhatsApp.
Can you use a pressing ham on ready-made clothes too?
Yes. A universal ham on a stand or a seam roll lets you press one area, such as a shoulder, collar or button placket, without spreading the whole garment on a board. This is useful before photographing a garment for an online store, before hanging it in a shop and after a repair.


